Hey!
Learn how to do the unzipped zipper nail design in this Nail Art: Zipper nails step by step tutorial! 🙂 🙂

We will need: CND Shellac Base Coat; CND Shellac Top Coat; CND Shellac Polish ‘Locket Love’; CND Shellac Polish ‘Plum Pasley’; Nail Art Brush; Zipper stickers.

1. As always, first apply CND Shellac Base Coat.

2. Cure it under the LED lamp for 2 minutes.

3. Apply two coats of CND Shellac Plum Pasley over the nails, curing each layer for 2 minutes. Leave the middle finger and the thumb.


4. Now apply the sticker to the middle finger.

5. Fill in the middle of the zipper with CND Shellac Locket Love and the nail art brush.

6. After the step 5 I took off the sticker and applied CND Shellac Plum Pasley with the same nail art brush over the left…

7. … and the right side of the gold color.

8. I then filled in the rest of the nail with the same plum color. Also do the same to the thumb. Cure for 2min.

9. Now the fun part! 🙂 Put each sticker on the nail in whatever order you want with the tweezers.

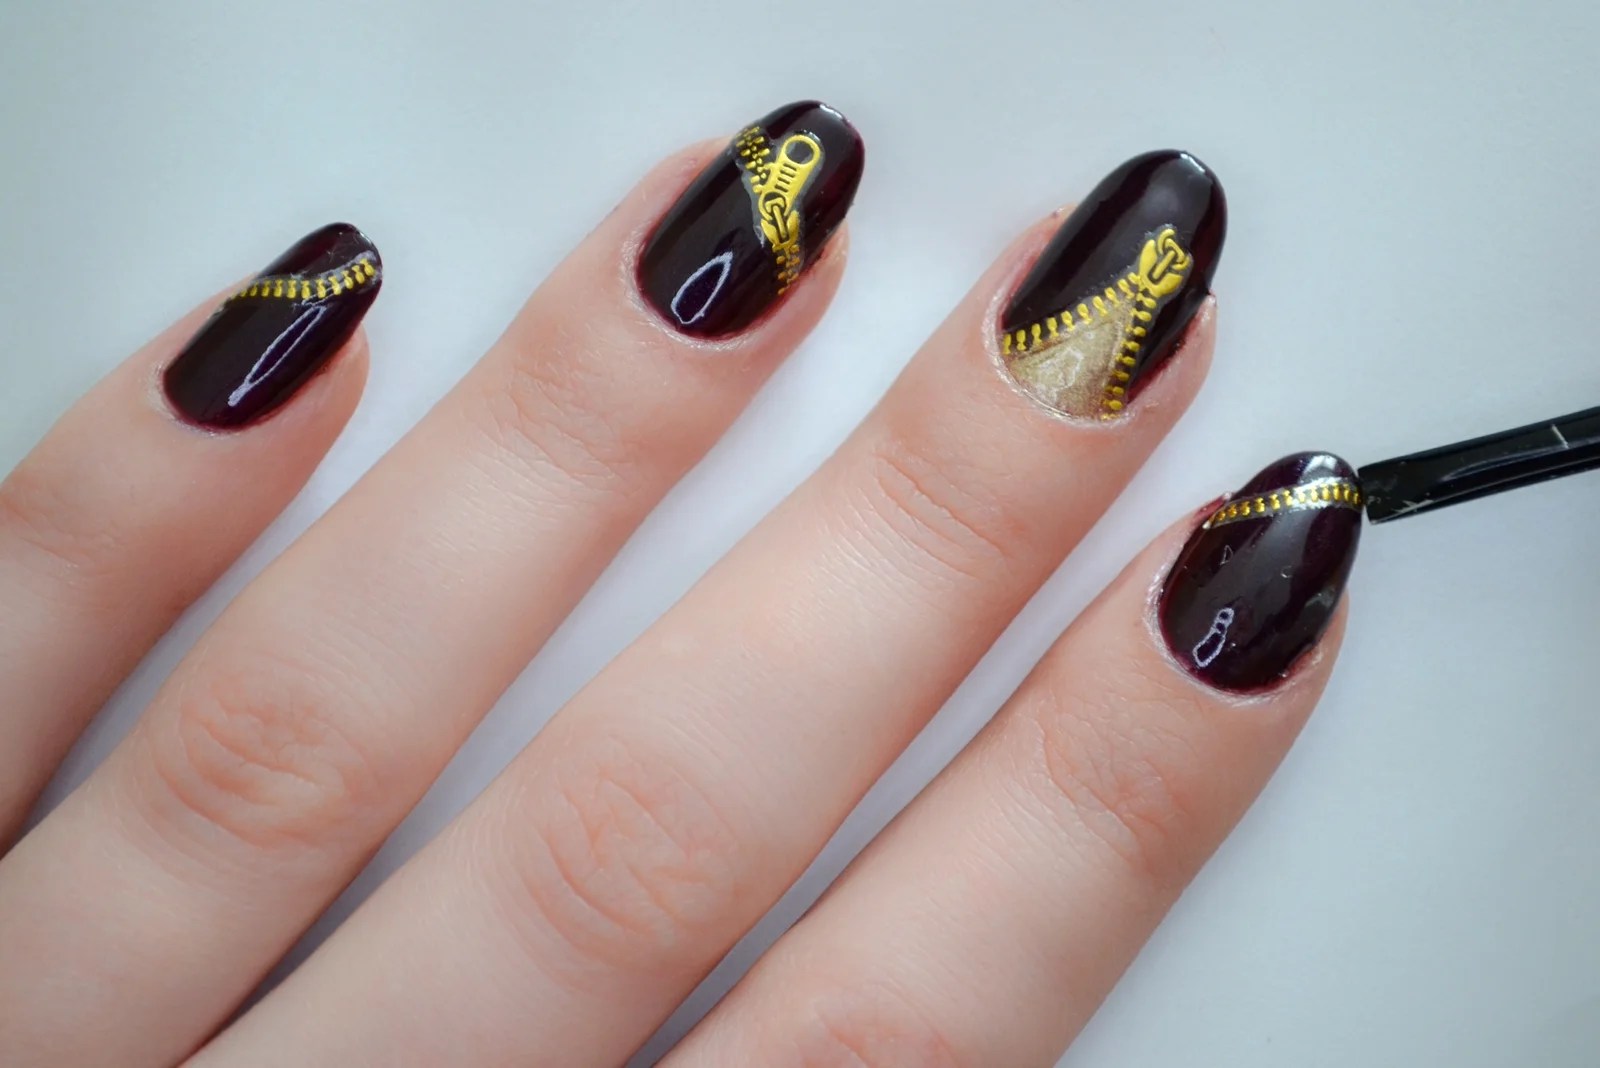

10. Apply a coat of CND Shellac Top Coat over the nails, cure for 2min. and that’s it!!! 🙂


You can buy the Zipper Stickers FOR ONLY 1$ HERE
Nail art design brushes HERE
THANK YOU FOR READING!
If you want to get notified when I post something new FOLLOW THIS BLOG. <3

your nails are perfect!!
Author April 7, 2015 / 3:04 pm
Thanks Lexi! They weren’t always so strong though. Gel and nail strenghtening recipes helped them 🙂
Super Cool Blog! One of my new fav places to visit for all thins beauty, especially nails! Light and Love, Shona
Author September 25, 2015 / 5:23 pm
Shona, that’s so nice to hear! Thank you so much 🙂 <3